Try UVACanvas Now: 10 Tools to Practice in Your ‘Workspace’
Introducing UVACanvas Workspace (Your Personal Sandbox)
Explore UVACanvas before you need to use it -- faculty and graduate students who teach now have a “workspace” to practice course setup in UVACanvas.
UVACanvas is our new, central Learning Management System (LMS). Many schools within the University are moving to UVACanvas in the coming semesters. To be better prepared for this transition, test out the tools below in your workspace now.
What Is a Workspace?
Your workspace is a private, personal “sandbox” space for you to:
- Get to know UVACanvas functionality.
- Practice course site setup (including uploading documents and structuring your course).
- Create content that can be imported into official course sites in the future.
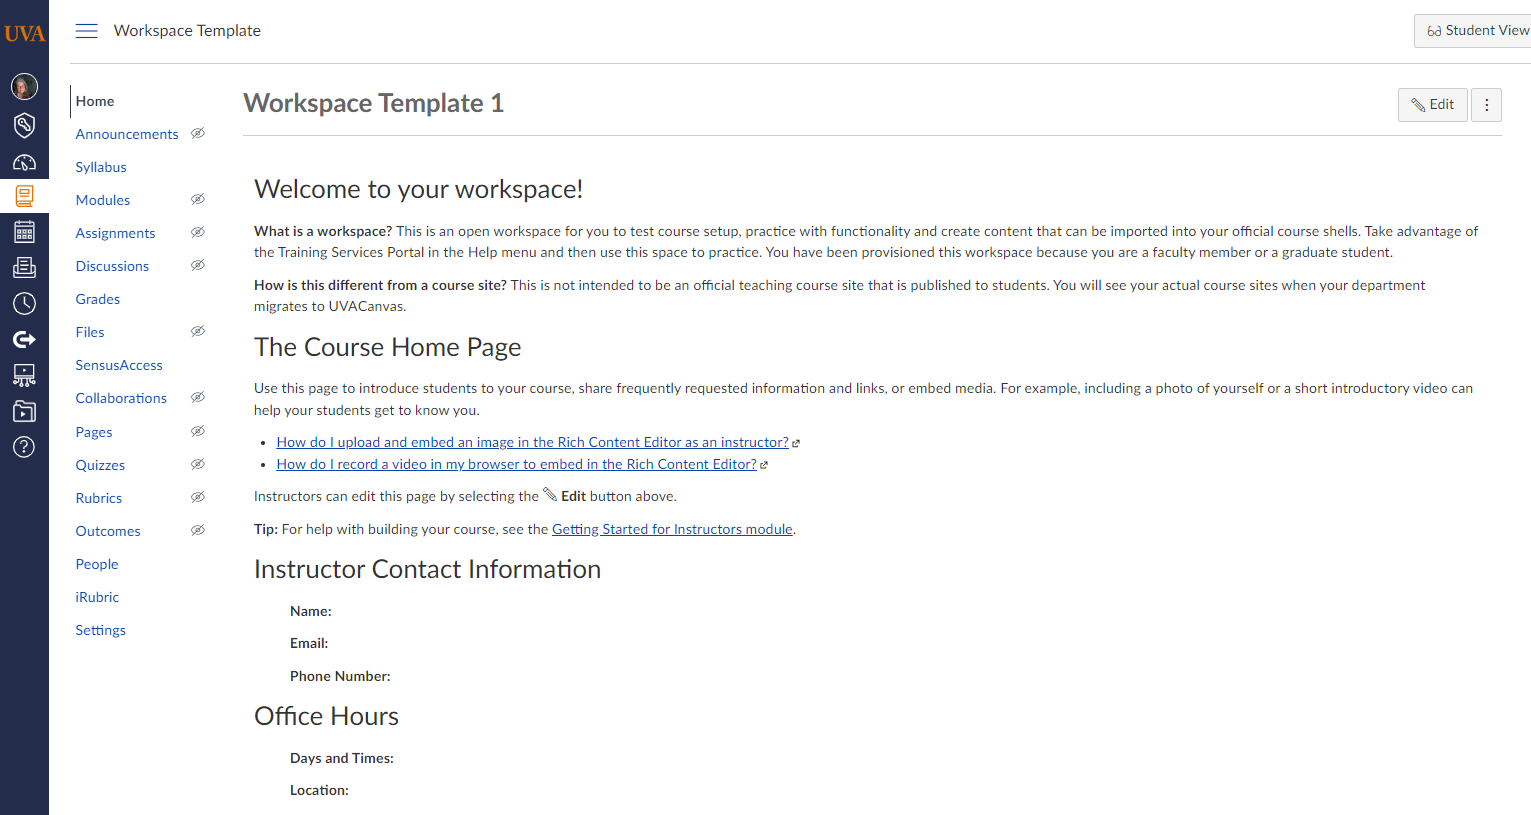
Your workspace functions as a UVACanvas course site template. Unlike official course sites, which will appear in UVACanvas as your active courses are added to the Student Information System (SIS), your workspace cannot be published, and access is limited to you alone.
Using Your Workspace
Use your workspace to practice setting up a course site and try out tools before and after your school moves to UVACanvas.
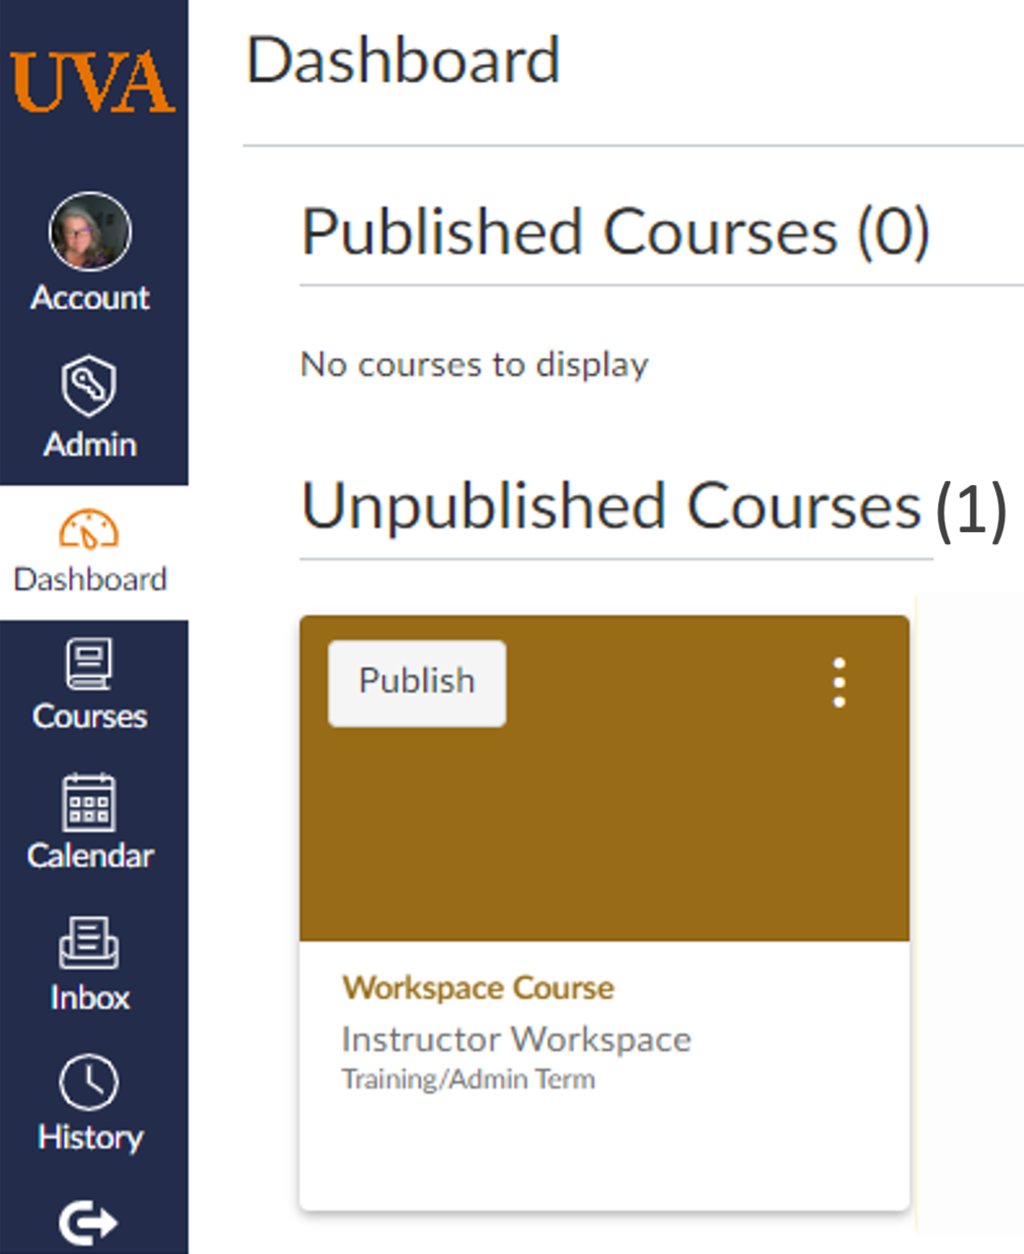
To access your workspace, log in to UVACanvas through NetBadge. Under “Unpublished Courses,” you will see a tile for your workspace. (You will not see any courses listed under “Published Courses” until you are actively teaching in UVACanvas.)
Not seeing a workspace in your dashboard? Instructors can request a workspace.
Use your workspace to practice:
-
1. Building modules
Use modules to organize your course site by week, unit, or whatever structure works best for your course. Modules introduce students to the new content, assignments, quizzes, etc., at the right time.
Tips:
- Start with modules, then add pages and content (e.g., assignments, quizzes) to each module. This will help keep your content and files organized.
- Modules can be restricted from student view until specific dates or after prerequisite modules are completed.
-
2. Adding pages and content
Add new pages to your course site to structure and display your content.
Tips:
- Post your syllabus as a page. (You can even set it as your course site homepage.)
- Upload files and give and restrict access to files within UVACanvas.
- Embed media (e.g., images, video, etc.) directly into your pages.
-
3. Using Student View
View a course the same way students view your course through Student View.
Tip: Click "Leave Student View" to return to instructor view.
-
4. Adding an announcement
Share recent news or information with students via announcements. Students can set notifications to see announcements without logging in to UVACanvas.
Tips:
- Schedule announcements for a specific date.
- Choose how you receive notifications in settings.
-
5. Starting a discussion
Discuss topics with students in a forum-style space that is accessible to the entire class.
Tip: Subscribe to discussions to receive response notifications and assign graded discussions to students.
-
6. Creating an assignment
Practice creating an assignment within a module. In your official course site, students can submit assignments via UVACanvas.
Tip: Embed Office 365 files into your assignments.
-
7. Creating a quiz
Practice creating quizzes within a module. In your official course site, a student's quiz can be graded automatically, depending on question type.
Tips:
- Allow students to submit once or multiple times.
- You can link course content to quiz questions.
-
8. Using SpeedGrader
Evaluate individual student assignments and group assignments quickly using SpeedGrader.
Tip: Open Student View to create submissions in assignments, quizzes, and graded discussions. Then, try out SpeedGrader by grading the submissions you created as "Test Student."
-
9. Adding additional tools to the course navigation
Control which links appear in the course navigation.
Tip: Students may not need access to all available tools. Consider limiting your navigation to the tools students will need and use frequently in your course.
-
10. Accessing the Training Portal
Learn more about UVACanvas via on-demand and live training options in the Training Services Portal. To access, go to the main navigation menu> Help > Training Services Portal.
Tip: Check out the "Getting Started for Instructors" module in your workspace.
Need Help With Tools?
When in UVACanvas, click on Help in the left-hand menu to access Canvas guides, the Canvas Community, and the Training Services Portal, which contains many self-paced and live courses designed to help you learn about Canvas and leverage its features and functionality. For help with building courses, access the "Getting Started for Instructors" module in your workspace.
If you need more help or have questions about UVACanvas, view For Instructors and Getting Help.
Plan to Use Your Workspace to Draft Course Content?
You can import your workspace content into your official course sites once they become available from SIS. See What's Next? below for more details.
What’s Next?
All instructors were sent an email regarding the migration of their SIS-rostered course sites into UVACanvas. Your course content from Spring 2022 to the time of your transition will be automatically migrated, with the opportunity to migrate up to five more courses. This migrated course content will be read-only and accessible through Unpublished Courses in your UVACanvas dashboard. For convenience, you will be able to easily import this migrated content into the official SIS-rostered course sites you will use in UVACanvas. Each semester, your official SIS-rostered course sites will appear and can be edited in UVACanvas.
More information is coming soon. For key dates and updates, view the Transition Plan.


